Easy Fix For A Vivarium Thermostat that Has Stopped Working
Is your bearded dragon’s vivarium duller and colder than usual? Perhaps the vivarium thermostat has broken. We show you how to possibly fix it cheaply

Last Updated: January 10th, 2022
By: Steve
Table of Contents
Have you woken up this morning to discover that your Bearded Dragon vivarium is looking a little duller than usual? Perhaps you’ve come home from work to discover their tank is sitting at room temperature and the basking light is not working. Do you suspect that your vivarium thermostat might be to blame?
Here’s some things to check before resorting to buying all new equipment. If you think it’s the thermostat that’s broken, you may be in luck – there could be a very simple and cheap fix available. Keep reading for more.
Things To Check
Bear in mind when checking these things that it’s quite possible – indeed highly likely – that there could be two or possible three things that are now wrong. We’ll start with the most obvious first;
Has the Bulb Blown?
This is the most common reason for a cold vivarium. Bulbs normally blow just after they are first switched on. So if your thermostat is an on/off variety, the bulb could blow at any time during the day.
It’s fairly unlikely – unless it’s really obviously broken – that you’ll be able to see whether the bulb has blow or not. The best way to check is to find another bulb that you know is working and try it in the holder. Of course, you need to make sure the fitting is the same. Alternatively, try the suspect bulb in a different holder briefly. Again, needs to be the same kind of fitting though.
If a different bulb works in the vivarium holder then you’re sorted. You’ve found the problem and you can stop looking.
Old bulb doesn’t work in new holder but new bulb also doesn’t work
This is a scenario I just went through, hence this post. The heat lamp had definitely blown in our bearded dragon vivarium – the inside was blackened. But when we replaced it with a brand new bulb, it didn’t work either.
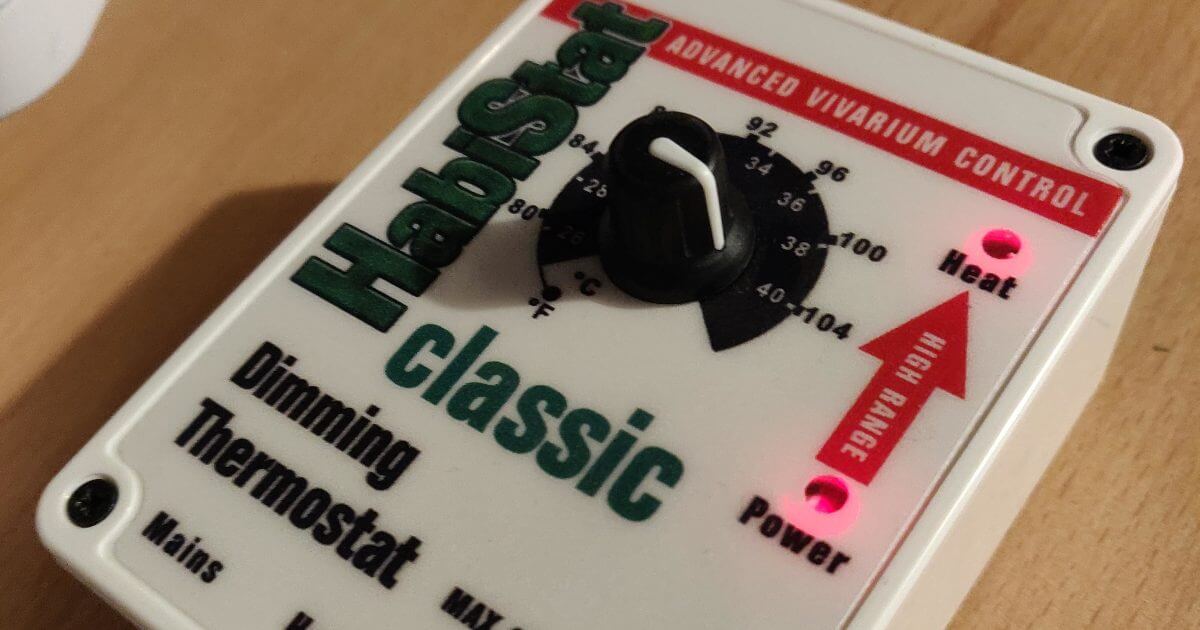
Checking the thermostat I could see that there was no power light showing either. My Habistat Dimming Thermostat has a 3 pin socket to power the basking lamp, so I took the basking lamp plug and plugged it in to the mains directly. Instant heat and light prevailed. So, the bulb was good. But this meant that the thermostat was also now broken.
Fixing a Broken Thermostat
Having discovered that the thermostat itself was also now faulty I suspected that perhaps the fuse in the plug had blown. Sometimes when a light blows it will blow trip switches in the house. In this case all the other sockets were working so I knew it wasn’t the trip switch. Perhaps though it was the fuse in the plug. I changed it. Still darkness.
At this point I thought I was going to be 50 quid down for a new thermostat. We’ve got the Habistat HiRange Dimming Thermostat which we bought in July. It’s been great and we much prefer the dimming aspect compared to the on/off thermostat we previously had. But we were disappointed that it had only lasted 6 months.
Fortunately, I looked a bit harder. Wait – there’s a fuse in the thermostat itself. Perhaps this had blown?
I opened the fuse holder and looked at the fuse. Great, it’s a very non-standard fuse. I’ll have to order one.
On to Google then to find what I need. Fortunately, they’re not as uncommon as they first looked.
In the Habistat Dimming Thermostat it’s a 20mm x 5mm 3.15A 250V Fast Fuse. It’s important to replace the fuse with the same variety to protect your thermostat. There’s various options available on eBay and Amazon that are either the wrong physical size or the wrong rating. There’s others that are slow blow instead of fast blow.
You’ll need the 3.15A 250V Fast Blow 20mm x 5mm ceramic fuse from Amazon. The link to the left will take you to the type that I just bought for mine.
Changing The Fuse

UNPLUG THERMOSTAT FROM THE MAINS. YOU DO NOT WANT TO GET AN ELECTRIC SHOCK FROM THIS THING. It should go without saying, but electric shock from mains AC can result in death. Unplug it first.
Changing a fuse can’t be that hard can it? It shouldn’t be. But the mechanism for the fuse on the Habistat Thermostat is a bit of a nuisance. It’s a strange mechanism.
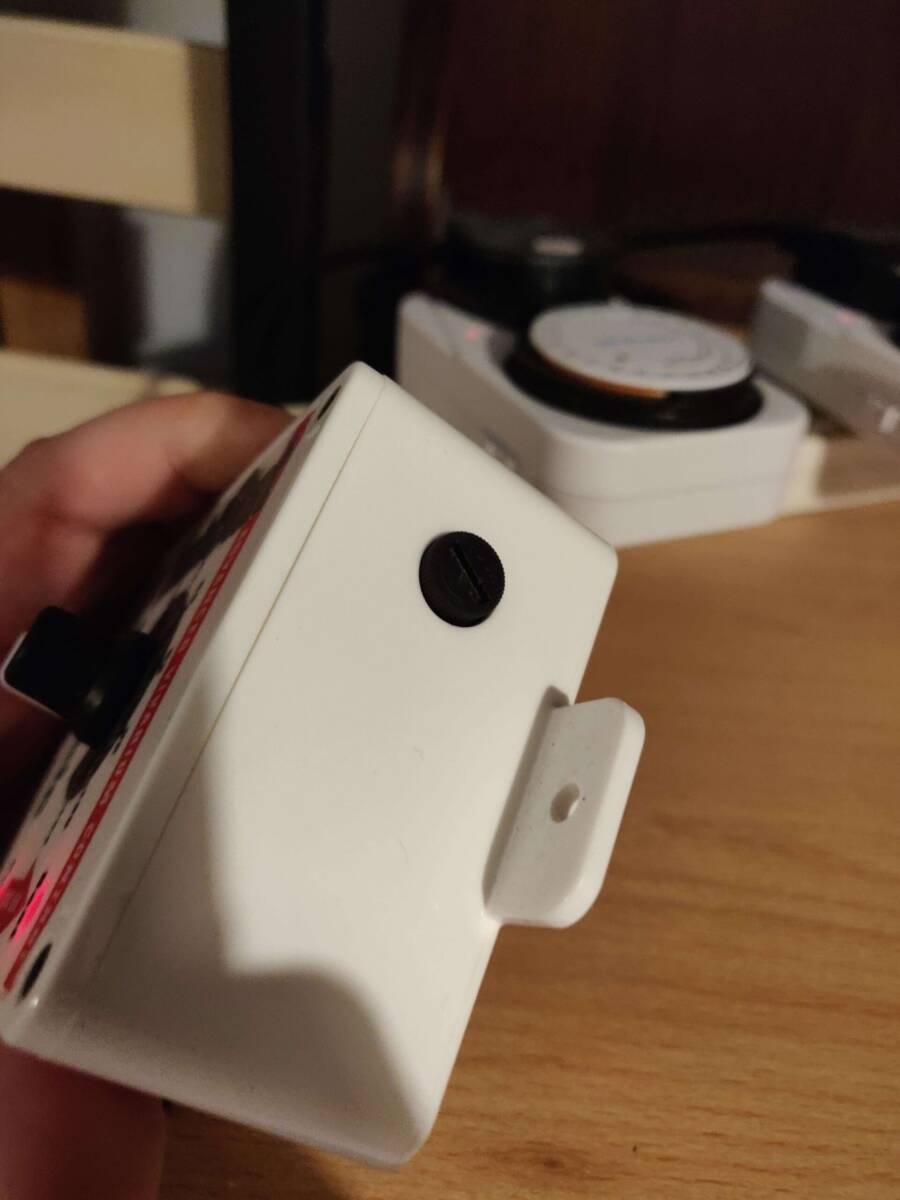
You’ll need a small screwdriver. To remove the fuse, place the screwdriver into the groove on the top of the fuse assembly. Push the fuse assembly in to the thermostat box. You’ll need to push fairly hard I found. The fuse assembly should go almost flush with the thermostat box. Then gently turn the assembly anti-clockwise about an eighth of a turn. Don’t force the turn. If it won’t turn, you’ll need to push the assembly further into the thermostat body. Once the fuse assembly has turned, release the inward pressure and it should pop out.
Replace the fuse with the same sized and rated fuse. Then the procedure for re-installing the fuse is the opposite of removing.
CAUTION – You Can Break It
I almost did. When attempting to return the fuse to the assembly, if you get it wrong you will bend the metal lugs that hold the fuse in place and provide the conduction surfaces to complete the circuit.
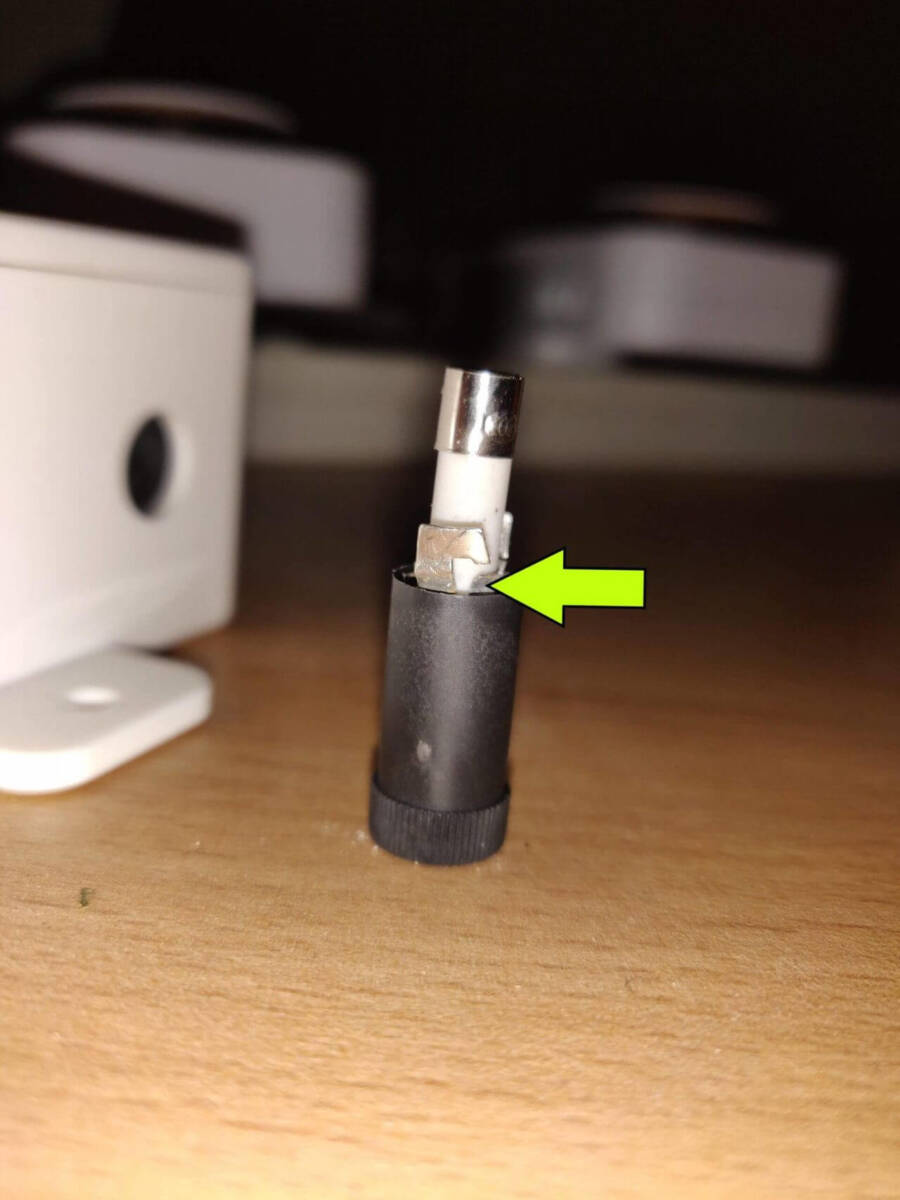
Look inside the fuse holder cylinder on the thermostat. You will see a silver ring at the bottom with 2 lugs sticking out. These lugs are what provide the attachment for the fuse assembly. Make sure the lugs on the fuse assembly are turned a little bit counter-clockwise compared to the lugs in the socket. Then slide the fuse assembly down into the cylinder. You will then need to push the fuse assembly down into the thermostat box. The assembly should go almost flush with the thermostat casing. If you can’t push it in far enough, wiggle it a little and turn it slightly more anti-clockwise until you can get it flush.

Don’t push down on it all too hard. It’s a little difficult to get in, but it doesn’t require huge force. Too much force will bend the lugs and they’re a nightmare to straighten again. I know….
Once the fuse assembly is flush, turn it approx an eighth of a turn clockwise and release the pressure. The assembly should pop up approx 3-5mm out of the thermostat casing. Try to pull it out gently. If it comes out, you’ve got it wrong 🙂
If successfully changed you can plug the thermostat in and with any luck your basking lamp will now work and you won’t need to replace your thermostat.
The image below should give you an idea how the fuse is inserted and held in place. The very bottom of the fuse holder hole (pictured above) is spring loaded. The picture to the left has an arrow highlighting the mechanism which attaches to the lugs. You can see that the fuse holder will have to pushed into the hole and turned slightly then released.

The idea being that the attachment sits underneath the lugs and the spring loaded mechanism makes a good contact. I personally think it’s a bit clumsy and too easily damaged, but it is what it is. And it does work – provided you don’t damage it. It’s also relatively safe, since it’s highly unlikely that you’ll get a shock off it
It’s very important for the life of your thermostat device that you replace the fuse with the right rating and fast blow not slow blow. The circuitry inside the thermostat is very sensitive. A sudden current surge from a blowing bulb could be enough to damage the components. A slow blow fuse will not react quick enough to protect the device. Equally, a fuse that has too high rating will not blow early enough and could destroy the device.
Testing The Fuse
If you’re not sure if the fuse has blown there’s a couple of fairly good ways to test it. The easiest way that doesn’t require any extra equipment is to check the ‘Power’ LED on the top of the thermostat. If there’s no power LED lit up (assuming your device has such a thing) then the fuse may well be blown.
Once you’ve got the fuse out you can check it with a multimeter. Set the multimeter to Ohms or Resistance reading and place one probe on each end of the fuse. It should show almost 0 Ohms. You can also set your multimeter to Diode mode (which often includes a beep function). If the fuse is still good then you’ll get a beep when you connect the probes. If it’s blown, you’ll not hear the bleep and your meter will probably display a digit 1.
Hopefully this post saves you having to replace your thermostat quite so often. Blown vivarium bulb is one thing, but replacing the thermostat when a simple fuse has blown is expensive!
If you do discover that you need a new vivarium thermostat then you can find some suggestions on our Equipment Needed For Bearded Dragons page.
Let us know in the comments if you have any questions or suggestions!
